

Gallery walls often fail in one of two ways. They are assembled too quickly from coordinated filler art and never feel personal, or they grow without a plan until every new frame makes the arrangement harder to balance. A lasting display needs enough structure to look deliberate and enough flexibility to accept one more meaningful piece later.
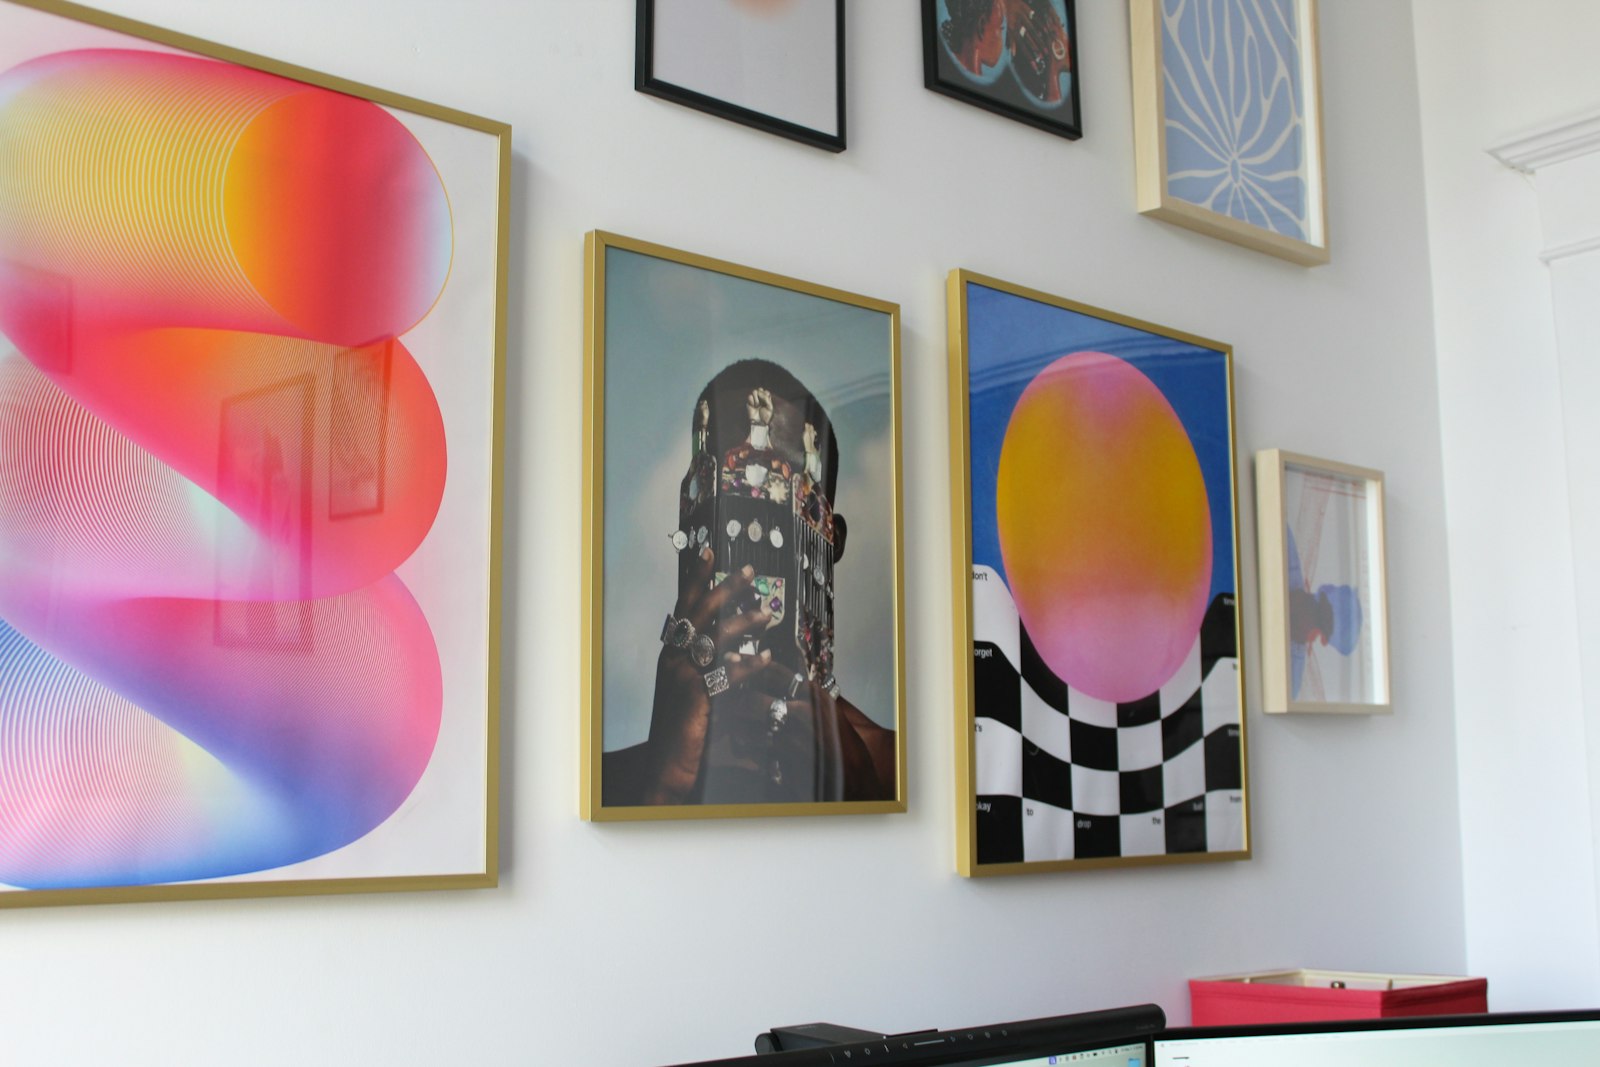
The work is mostly planning. Once the composition has been tested at full scale and the correct hardware selected, installation becomes a sequence of measured decisions rather than a wall full of hopeful holes.
Decide what holds the collection together
The unifying element does not have to be matching frames. It might be subject matter, a limited color range, generous white mats, one repeated wood tone, or the fact that every item has a personal story. Choose one or two links and allow variation elsewhere.
Gather more pieces than the wall requires. Include photographs, paintings, prints, textiles, maps, children's art, or small flat objects that can be mounted safely. Remove anything included only because its dimensions are convenient. An empty space is better than an image you do not want to see.
If several pieces need framing, mix ready-made and custom frames strategically. A standard frame with a custom-cut mat can make an unusual print size look considered without the price of complete custom framing.
Choose the boundary before the layout
Measure the available wall and the furniture beneath it. A gallery over a sofa or console should relate to that object rather than floating independently. Mark a broad outer boundary with low-tack painter's tape and view it from the entrance to the room.
The display does not need to fill the wall. Leave enough margin at ceilings, corners, switches, and adjacent artwork. In a stairway, decide whether the arrangement follows the stair angle or forms its own block; mixing both logics can look accidental.
Record the exact location of each obstruction and check the wall for vents, controls, wiring, and plumbing. Never drill simply because a spot looks empty.
Pick a composition style
A grid uses frames of the same size and consistent spacing. It suits a related series and creates a calm architectural effect, but small measurement errors are obvious. An organic arrangement combines sizes around a visual center. It is forgiving and easy to expand, though it still needs controlled spacing.
A ledge arrangement allows art to overlap and change without repeated wall holes. It introduces a horizontal line and physical depth, so it may not suit a narrow passage. The ledge itself must be installed and loaded according to its rating.
For a first gallery wall, an organic rectangle is versatile. Keep an imaginary outer shape while varying interior edges. Begin with one larger anchor slightly off center, then distribute medium and small pieces around it.
Build the arrangement on the floor
Clear a floor area similar in size to the planned wall and mark the boundary with tape. Place the anchor first. Add the next-largest pieces so their visual weight is distributed, not clustered on one side. Fill gaps with smaller frames.
Maintain a fairly consistent interval between neighboring pieces. The exact measurement matters less than the impression, because ornate frames and irregular objects change the visible gap. Step back often and photograph alternatives from above.
Consider visual weight, not only physical dimensions. A dark, high-contrast image can balance a larger pale print. A thick black frame attracts more attention than a fine light-wood edge. Rotate pieces through several positions before deciding.
Make full-size paper templates
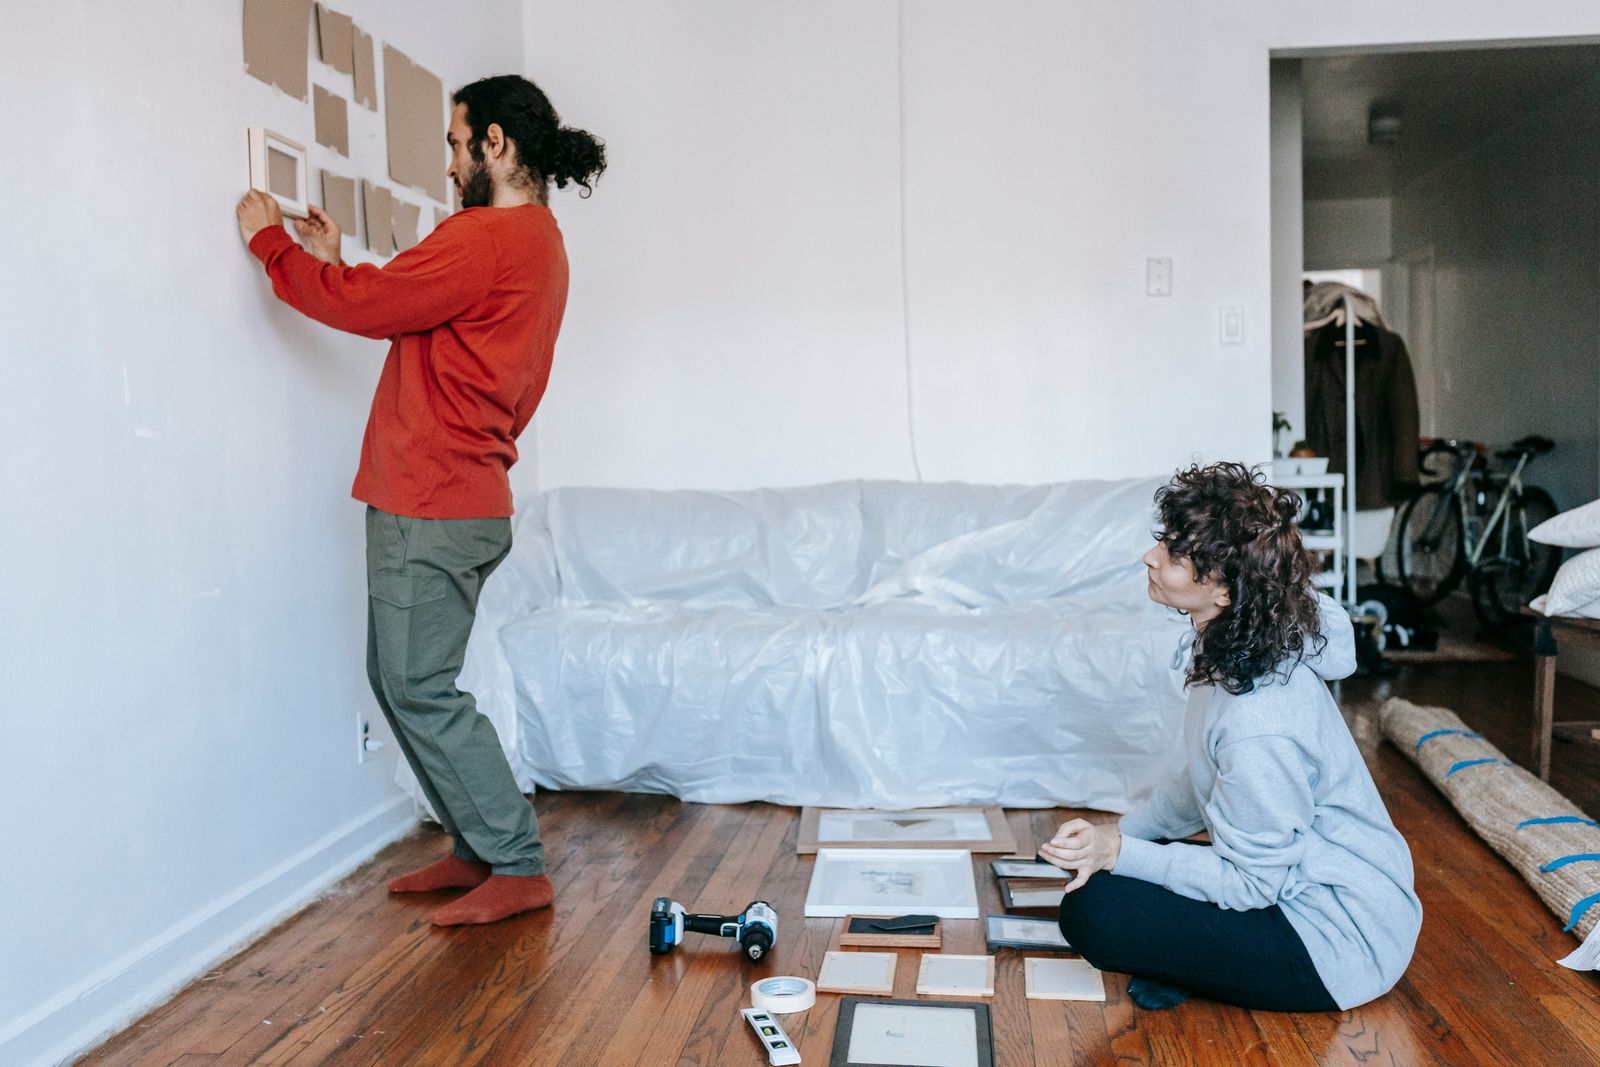
Trace each frame onto kraft paper, paper bags, or inexpensive roll paper. Mark the top, title, and precise hanger position. A sawtooth hanger, wire, and two D-rings all sit differently, so do not estimate from the outer frame.
Tape the templates to the wall within the chosen boundary. Live with them for at least a day. View the arrangement while sitting and while entering the room. Make sure the lowest frames are not vulnerable to heads, chairs, or objects placed on the furniture below.
Templates expose scale problems that a small sketch cannot. They also allow another household member to understand the proposed result before any holes are made.
Select hardware for the wall and weight
Weigh each framed piece. Identify whether the wall is drywall, plaster, masonry, wood paneling, or another material. Use picture-hanging hardware or anchors designed for that wall and load, following the manufacturer's instructions. When a stud is in a useful position, it can provide strong support, but the layout should not assume every hanger will land on one.
Heavy objects, glass, and pieces above seating deserve extra caution. Two attachment points can reduce shifting and share load when the frame is designed for them. Do not hang a heavy frame from a weak sawtooth tab merely because a strong wall anchor is available; every part of the system must be adequate.
Check for electrical cables and plumbing before drilling. If you cannot determine a safe route or appropriate fixing, use a qualified installer. Adhesive strips can work for specified lightweight frames on suitable, properly prepared surfaces, but texture, paint condition, humidity, and removal technique affect results.
Transfer one point at a time
Begin with the anchor template. Use a level and measure the hanger position marked on the paper. Some installers drive a small pilot or mark directly through the template, then remove the paper before inserting hardware.
Hang the first piece and verify it before moving outward. Do not install every hook based solely on paper; real frames may vary slightly. Work from the anchor to adjacent pieces, checking spacing and level as the composition grows.
For wire-hung frames, measure where the wire sits under load, not where it rests loosely. Pull it upward with a tape measure to simulate the hook. Two hooks can improve stability, but placement must allow both to share the weight.
Keep frames straight without overfixing them
Small clear bumpers on the lower back corners protect the wall and reduce movement. A tiny amount of appropriate removable mounting material may stabilize a very light frame, but it should not carry the primary load.
Doors closing, uneven walls, and cleaning can shift art. Accept that an organic gallery may need occasional straightening. A rigid solution that damages paint or frame backs is rarely necessary.
Clean glazing and frames before hanging. Use products appropriate for acrylic or glass, and avoid spraying liquid directly where it can run behind the frame.
Design for growth
Leave one or two plausible expansion edges. Keep a photograph with measurements and store spare matching hardware. When adding a piece, return to the paper-template method rather than filling the first visible gap.
Another option is to rotate art seasonally while keeping the frame layout. This works best when several frames use standard mat openings. Store unused pieces flat, dry, and protected from direct light.
Do not force the wall to grow forever. Once the outer boundary is complete, begin a second display elsewhere or replace a less meaningful item.
Avoid the most common regrets
Hanging everything too high is the classic mistake. The composition should relate to normal eye level and the furniture below, not the ceiling. Another is using frames so small that the wall reads as scattered dots. Fewer, larger pieces often have more presence.
Perfectly matching generic art can feel temporary, while uncontrolled variety feels noisy. The middle ground is personal content edited by one or two visual rules. Resist adding decorative words solely to fill a narrow space unless the typography genuinely matters to you.
Finally, do not conceal damage, dampness, or an electrical problem behind art. Resolve the underlying issue first.
Let the wall become a record
A successful gallery wall is not judged by whether every frame came from the same shop. It is successful when the arrangement supports the individual pieces and the collection feels connected to the household. Full-size planning, safe hardware, and measured spacing create the framework. Time supplies the character.
Sources and further reading
- U.S. Consumer Product Safety Commission, home safety education: https://www.cpsc.gov/Safety-Education
- Smithsonian Museum Conservation Institute, caring for paper objects: https://mci.si.edu/caring-paper-objects